Adding and removing disk drive in VirtualBox
If in VirtualBox' virtual machine you run out of disk space, then you can add a new disk in virtual machine's settings. Do as following:
-
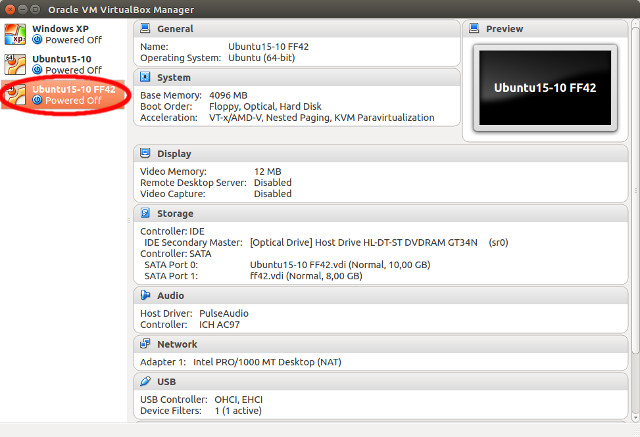
Select chosen virtual machine
click it right mouse button and from the menu choose "Settings..." option.

-
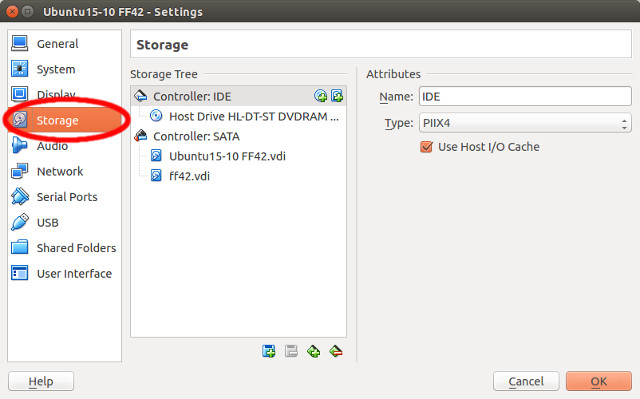
In virtual machine's settings dialog box in left panel click "Storage" item:
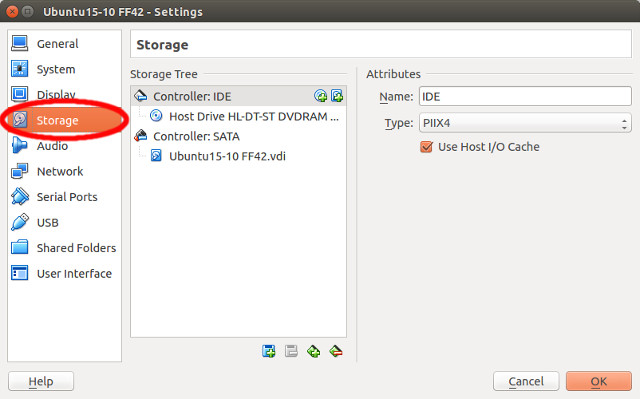
-
In the middle part of the window in "Storage Tree" panel select "Controller: SATA" item and in its right part
click "Adds hard disk" button:
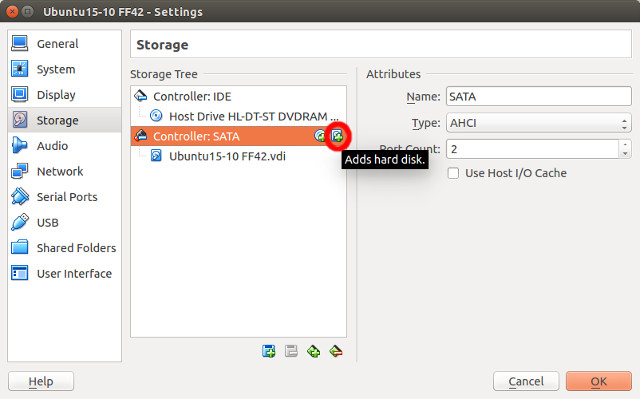
-
In dialog box that appears click "Create new disk" button:

-
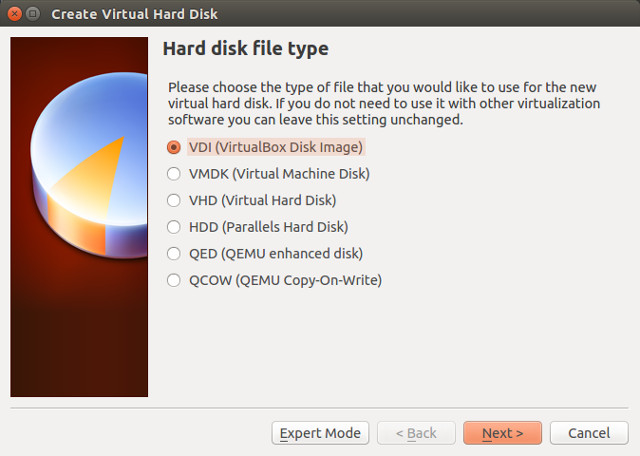
In the next dialog box select "VDI (VirtualBox Disk Image)" option and click "Next" button:
-
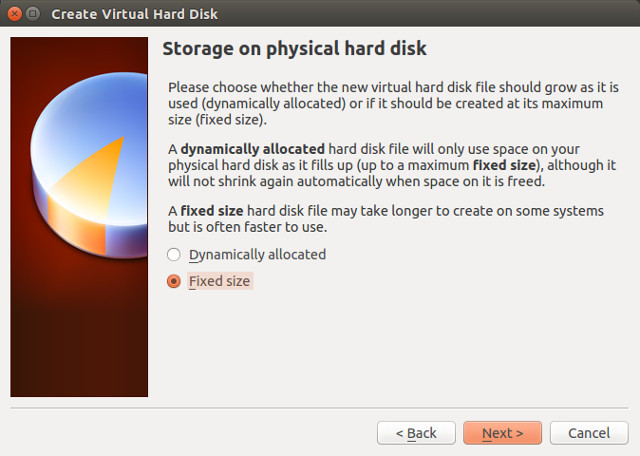
In the next dialog box select "Fixed size" option and click "Next" button:
-
In the last dialog box type in disk's file name (without extension, ex. "ff42"), disk's size (ex. 8GB -
you have to have such free space on real hard disk which the virtual disk is created on) and click "Create"
button:
Now you have to wait for a few minutes until new disk will be created:
 And at last click OK button in the window above to apply the changes and finish virtual machine configuration.
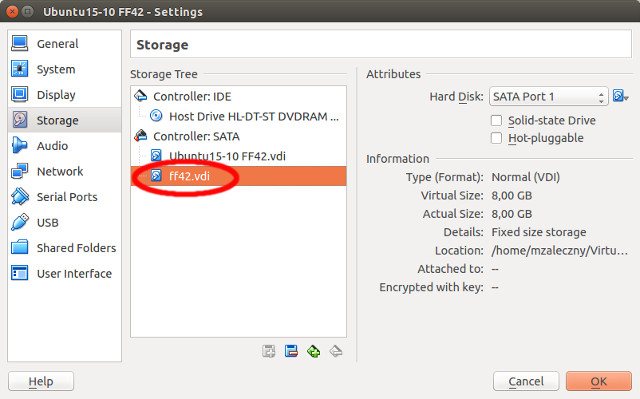
How to prepare a disk to work in virtual machine with Ubuntu 15.10 on board:
To be able to utilize new virtual hard disk, you have to:
- create a prtition table of type msdos on it,
- create one or more partitions on it and format them in a specified filesystem (in our case it is one partition with ext4 filesystem),
- mount the partition in Ubuntu system.
First what you have to do now is run the virtual machine and install gparted tool:
sudo apt-get install gparted
Next execute gparted with following command:
sudo gparted
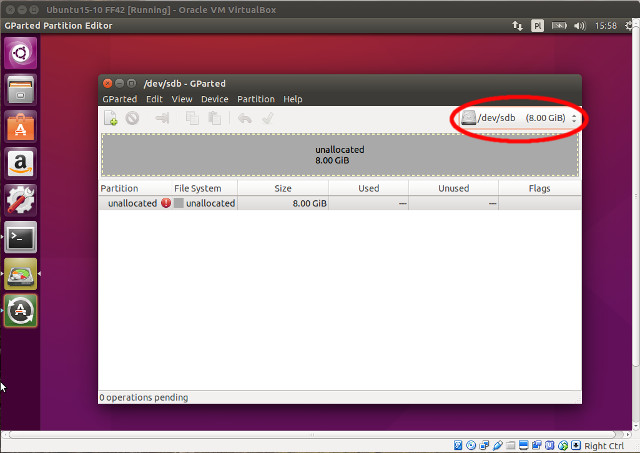
In the gparted's main window in the upper right corner select the newly added disk (/dev/sdb):
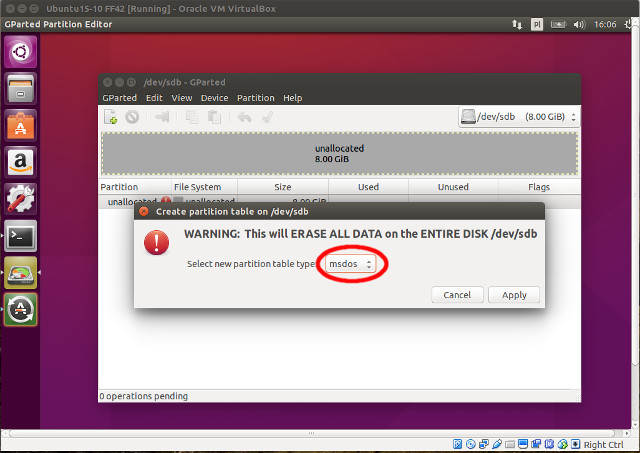
Now from the main menu select an option: Device -> Create Partition Table..., accept selected by default partition table type (msdos) and press Apply button:
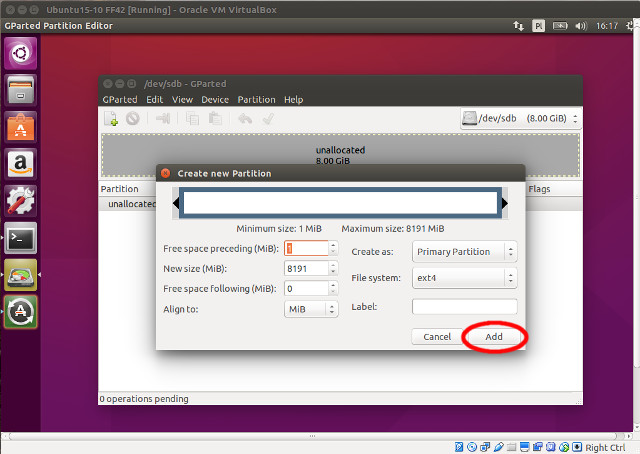
Next click with right mouse button a grey unallocated area of the disk drive space and from the menu select New item. In the dialog box that will appear accept default settings to create one partition which spreads all the disk space and click Add button:
In the end you have to apply the changes to the disk. To accomplish this, click the green tick icon in the toolbar:
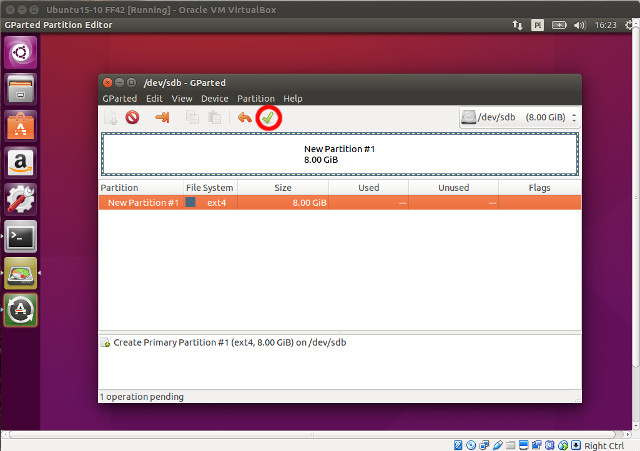
After changes was applied you can close gparted application. Now you have to mount new disk
in some directory. To do this, create in your home directory a directory ff42:
cd && mkdir ff42
and mount new disk in it:
sudo mount -t ext4 /dev/sdb1 ~/ff42
Change directory privileges to allow all users for a full access to the directory (thanks to it you will have
full access as a casual user and not only as a root):
sudo chmod 777 ~/firefox42
At this point you will want the disk to be automatically mounted at the system startup so issue following
commands (CAUTION: directory /home/mzaleczny/ff42 below replace with full path to the directory ff42 in your
system):
        sudo bash -i

        echo -e "/dev/sdb1\t/home/mzaleczny/ff42\text4\terrors=remount-ro\t0\t1" >> /etc/fstab

        exit
Removing disk in VirtualBox
To remove unnecessary disk drive associated to a virtual machine, you should:
-
Select chosen virtual machine
click it right mouse button and from the menu choose "Settings..." option.
-
In virtual machine's settings dialog box in left panel click "Storage" item:
-
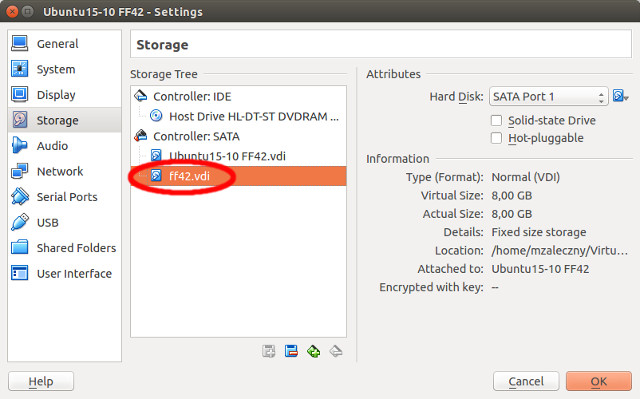
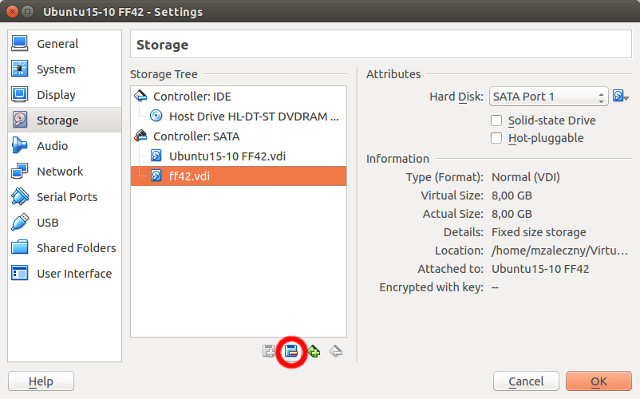
In the middle part of the window in "Storage Tree" panel select disk to remove:
-
Press the "Removes selected storage attachment" button:
-
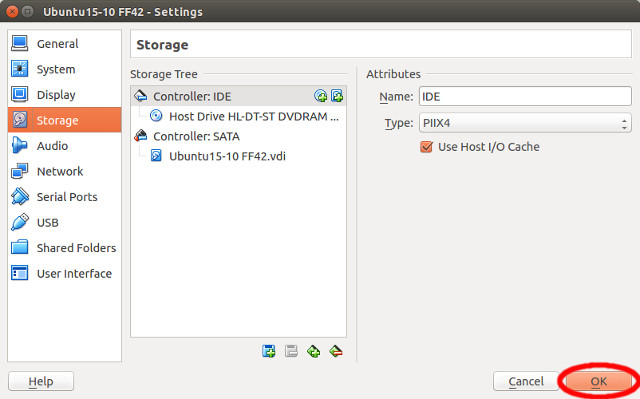
Apply the changes by pressing OK button:
-
After operations above virtual disk will be removed from virtual machine, but not from the real disk drive.
So if you would want to add it again nothing prevents you from doing it. To completely remove virtual disk,
navigate to the ~/VirtualBox VMs/Ubuntu15-10 FF42 directory (the path should be specified
according to your system settings) and there delete a ff42.vdi file.
Next open the file Ubuntu15-10 FF42.vbox (file name should be adequate to your system)
and there in HardDisks section delete a line HardDisk containing
reference to the disk - location="ff42.vdi" (the line in red in a snippet below):
Thanks it the virtual drive will be permanently removed.<HardDisks> <HardDisk uuid="{50aa5fa6-42ff-4413-87e5-02d821b2f1aa}" location="Ubuntu15-10 FF42.vdi" format="VDI" type="Normal"/> <HardDisk uuid="{cdb010f5-77dc-4c0c-9739-41c96f544076}" location="firefox42.vdi" format="VDI" type="Normal"/> <HardDisk uuid="{9b2c085a-5c79-4234-aa9b-491cc316914c}" location="ff42.vdi" format="VDI" type="Normal"/> </HardDisks>